Azureus is a BitTorrent client, written in java.
The BitTorrent protocol is a new way of exchanging or distributing data over the internet (see http://bitconjurer.org/BitTorrent/introduction.html ). Downloading also means uploading, and the amounts of each are linked, to ensure fairness and rapidity in the spread of the file at hand.
To be able to download a file, you first need to get the associated .torrent file. This file, usually a dozen KB in size, is the “signature” of the much bigger file to be downloaded, and it needs a software to be read properly.
Azureus is such a software.
If you want to host files yourself, you need a tracker, which is basically a central server coordinating the connections between peers.
Azureus can provide a tracker too.
You will find, as you discover its functionalities, that every feature has a purpose and they really make it easy to customize your Azureus to exactly fit your needs.
Let us now see how it works.
1. Getting started
a. File Menu

§ You can choose to open a torrent file, an URL or even a folder (with torrent files in it).
Either you want to save the file in a default directory (that you can specify in Configuration > File (see 3. a.)) or you may want to save it elsewhere.
If you choose to open a folder, each torrent file in the folder will be opened.
§ You may also want to create a torrent.
For that you need a file (or directory) you want to distribute and a tracker to host the torrent.
If you already have a tracker, put its URL in the torrent maker and specify which file (or directory) is to be shared. And Azureus will create the torrent. You can even specify the sizes of the pieces you wish to use.
If you don’t have a tracker, you can use the Azureus’ embedded tracker (see 3.j. for more information on how to properly set it up).
§ Azureus lets you export or import a torrent in XML format.
b. View Menu

c. Tools Menu

The Tools menu lets you access the main features.
§ Options is discussed in 3.
§ The configuration wizard helps you configure Azureus in the best way your internet connection allows. You should run it the first time Azureus starts.
§ The console displays the inner workings of Azureus and the communications with peers.
§ Statistics can be shown as a graphical representation of both download and upload rate. It opens an “Activity” tab, which will look like this:

And a cache tab (you can change the size of the cache in Options > Files > Performance Options):

d. Plugins Menu
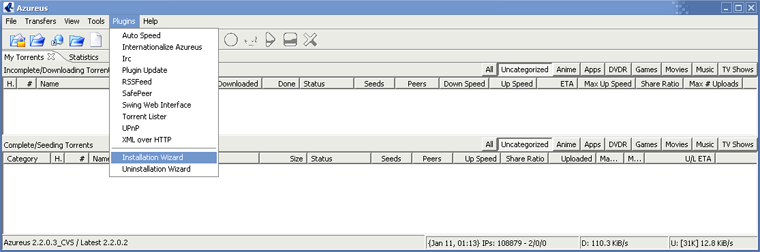
- You can access IRC easily to find help.
- Azureus comes with a plugin installation wizard that gives you info on the available plugins and lets you install them easily.
e. Help Menu

§ The About box gives credits for the program.
§ FAQ opens your web browser to the Azureus FAQ page.
§ You can manually check for an update.
§ And you can make a donation if you are satisfied with Azureus to help and ensure its development!
f. About Health
Introduced in version 2.0.6.0, the health indicator is quite useful to understand how well a torrent is running:

So, what are NAT problems?
NAT is Network Address Translation, which means that there is something between your PC and the internet making the connection. This device can be either a firewall or a router, and it needs to be properly configured for Azureus to run.
§ For a firewall, you need to open the ports used by Azureus in TCP. By default from 2.0.6.0 on, it is only port 6881.
§ For a router, you need to forward the ports used by Azureus in TCP. By default from 2.0.6.0 on, it is only port 6881.
So to solve that kind of problem, please refer to your manual to set up your device correctly.
Check the wiki! NAT
2. Advanced Information
a. General

- All the information about the torrent: how much you have downloaded, what’s available through all the peers you are connected to, your download and upload speed.
- You can limit here both your download and your upload speeds, as well as adjust the number of people you send to at a time (max uploads).
- In the tracker status, you can check if the tracker is running ok or if you have problems connecting, temporarily (timeout) or probably permanently (connection refused). A scrape error is not critical at all (it just means the tracker will not tell you the total number of seeds and peers in the swarm).
b. Details
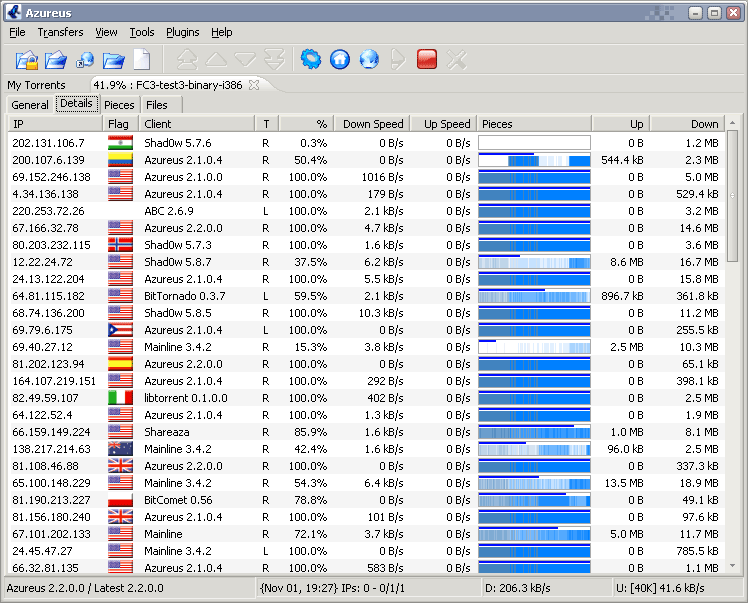
IP: IP of the peer
T: l (local): you established the connection, r (remote): the peer
established the connection.
I: Are you interested in what the other peer has?
C: But is that peer choking you? (meaning is he stopping you from
downloading?)
Pieces: Pieces the peer has
%: % downloaded by the peer
Down Speed: Your downloading speed from the peer
Down: Your overall download from the peer
I: Is the peer interested in what you have?
C: But are you choking the peer?
Up speed: Your uploading speed to the peer
Up: Your overall upload to the peer
Stat Up: An estimated value of the upload speed of the peer
Overall Down Speed: The total download speed of the peer
S: A peer can be "snubbed" for not delivering data at a high
enough rate.
This snubbing
can be set manually.
Opt. Unchoke: (Optimistic Unchoke)
In the decision making of whom to unchoke, random has its place.
Client: Type of BT client the peer is using (currently identifying
Shadow's Experimental and Azureus).
Discarded: Amount of discarded
data send by the peer.
- The flags can be displayed thanks to the CountryLocator plugin. Install it, go to this details view, right-click and select the columns to display.
c. Pieces
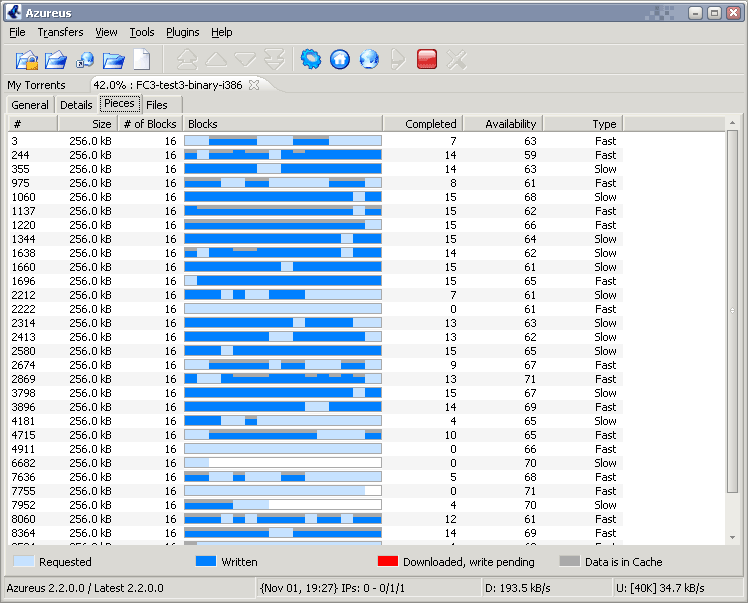
- The file you are downloading is made up of many small pieces: here you can see how far along you are getting the pieces.
d. Files
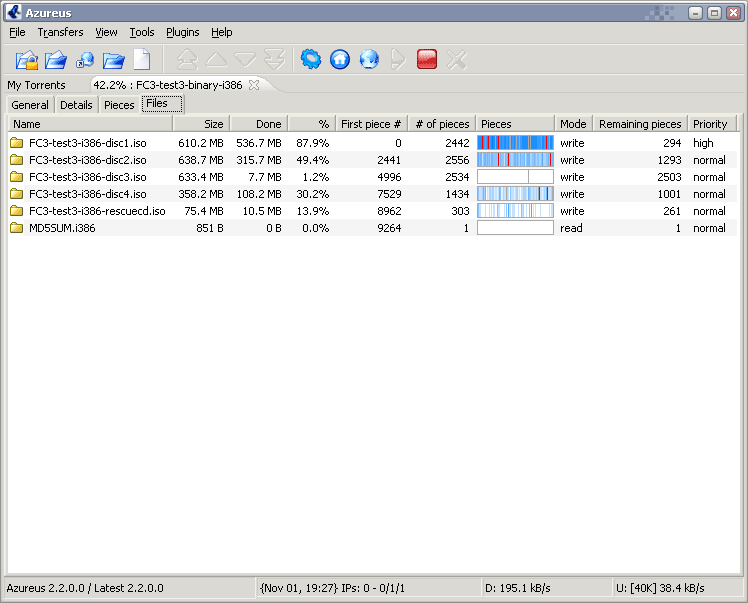
- This view lets you see what files compose the torrent you are downloading.
- You can set priorities to each of these files, set to “high” if you want to get one faster… or to “do not download” if you don’t need the file…
3. Options
a. Files

Fine tune the way Azureus handles files.
¨ You can pre allocate the space used by the file (“Allocate and zero...”) or you can make Azureus increase the size of the file as it is downloading (“Enable incremental...”)
¨ To be completely sure no piece was missed, you can “Re-check pieces when download is done”.
¨ “Use Fast Resume mode” saves the state of your downloads in the torrent file so that if you stop and restart, it will resume instantly. You can specify the time Azureus saves resume info.
¨ You can save your torrents files (as well as backup torrent files if you want them untouched, as Azureus can save resume data in them – they are however still usable by any client), and you can specify a default save directory and then move the files when they are completed.
¨ “Import new torrents automatically” lets you choose a directory that will be scanned for new torrents and automatically added to Azureus’ queue. (in Files > Torrents)
b. Connection

¨ Incoming TCP listen port: Azureus only uses one port for all torrents. This is the port to open in your firewall or forward in your router, if any.
c. Seeding

You can render your seeding automatic, with a few rules that cover all the possible scenarios.
¨ You can stop seeding once you have shared x times more than you have downloaded,
¨ Stop seeding when there is at least 1 seed for x peers,
¨ Start seeding if there is less than 1 seed for x peers,
¨ Or start seeding when the number of seeds drops to x (this will have priority on the other rules).
Super Seeding is a special optimized seeding mode.
Only use this mode when you are the first and only seeder.
Each peer will be assigned a
piece, and Azureus will then compute the time it takes for that particular
piece to be seen again the swarm, thus identifying peers with high upload
speed, to which Azureus will preferentially give data.
When activated, additional information is available in the details view,
right-click, "Choose the columns to display".
d. Transfer
![]()
These values are taken care of through the configuration wizard run at the first start of Azureus on your system. They are indeed very dependant on your internet connection. The configuration wizard is available through the File Menu.
¨ “Max active torrents” is the total number of torrents “downloading”, “seeding” or “ready”.
¨ “Max simultaneous downloads” is the total number of torrents that are “downloading”.
¨ “Max number of connections per torrent” is the maximum number of peers to which you can be connected on a torrent. Should you experience crashes when running Azureus, try lowering this value.
¨ “Default max uploads per torrent” is the number of people to whom you will upload data on a torrent. This value has to be higher than 2KB/s otherwise poor performance could result.
e. Display

- You can adjust the “look” of your Azureus here.
f. IRC

Azureus has a built-in IRC client, thanks to PIRCBot.
You need to specify a nickname to get connected. To connect, go to the Plugins menu and choose IRC.
g. IP Filters

Azureus enables IP Filters.
¨ That means you can enter a range of IPs you don’t want to have access to your computer (which will mean all IPs will have access except the ones you specify).
¨ On the contrary, you can also choose to enable only some IPs (which will mean that all IPs will be blocked except those you specify).
h. Statistics

i. Interface

j. Tracker
![]()
This is where you set up the Azureus’ embedded tracker.
¨ First you need to have a “fixed” external IP address. Click on the “Check Address” button and everything will be explained.
¨ You can then choose the port on which the tracker will operate.
¨ The “Tracker client poll interval (secs)” is the time your tracker will ask the peers connecting to it to wait before asking the tracker again.
¨ On the tracker URL, which will be something like http://yourExternalIPAddress:6969/, you can choose to publish details about the torrents you are hosting (or just publishing). And the access to that webpage can be protected via a password (“Enable password on tracker web”).
¨ “Publish torrent file and peer details” gives even more information, on the webpage, about who is downloading the torrent and how much is being transferred.
k. Logging

- If you want to keep track of the console output, enable logging to file.
4. Embedded Tracker
Azureus includes a tracker, and the “My Tracker” View, accessible through the View Menu will show both the torrents you publish and those you host.
a. Publish
The "My Torrent" context menu item "Publish" enables you to publish a torrent to your tracker's web page without hosting it. This provides a quick way of sharing a torrent with other users. The torrent's existing tracker will be used by any other users, not yours.
b. Host
You can host a torrent when you created it using your tracker.